Appearance
Getting Started
Preface
Depending on what operating system (Linux, Windows, etc.) you are running, your setup instructions will be slightly different. While using Linux is highly encouraged, it is not at all a requirement to work on this project.
WARNING
Even if you only want to work on either the frontend or the backend portion of this project, please keep in mind that both portions will need to be configured.
INFO
If you are using Windows and would like to try using a terminal inside of Linux without creating a virtual machine, you might want to look into installing Windows Subsystem for Linux.
We are excited to have you! 🤗
Some definitions
As a quick note, the frontend of our project is the React Native app we're developing, which individual clients (or users) will use. We may sometimes refer to this as the client-side portion of our app. The backend (sometimes referred to as the server) is what our frontend app uses to communicate to our database. It allows the creation, retrieval, and searching of data to be done via HTTP requests, as well as some other means you will learn about later.
Prerequisites
Although you do not need any prior experience to contribute to this open source project, a bit of experience with web development would help you greatly in contributing and understanding the code.
Here are some recommended simple tutorials to get you caught up:
- HTML/CSS: HTML & CSS Full Course - Beginner to Pro
- Javascript: JavaScript Full Course for Beginners
- ExpressJS: ExpressJS Tutorial
- React Native React Native Tutorial
TIP
You only need a basic understanding. Don't be afraid to ask teammates to help you understand the code better!
However, the best way to learn (in Wang's experience) is to always read the code and ask questions. Contact a tech lead if you are having trouble, and we will be more than glad to help you learn the tech stack!
Prerequisites
First, ensure you have a stable version of Node.js and Git installed on your system (LTS or Long Term Release versions are preferred). If you use a package manager, check its wiki for any extra installation instructions.
TIP
If you run into problems running Node.js, you may want to install Node Version Manager as an alternative. Setting this up can be slightly more in-depth, but it is another option.
Branching and Cloning the Repository
When contributing to this project, make sure to commit changes into your personal repository that is forked from the main one.
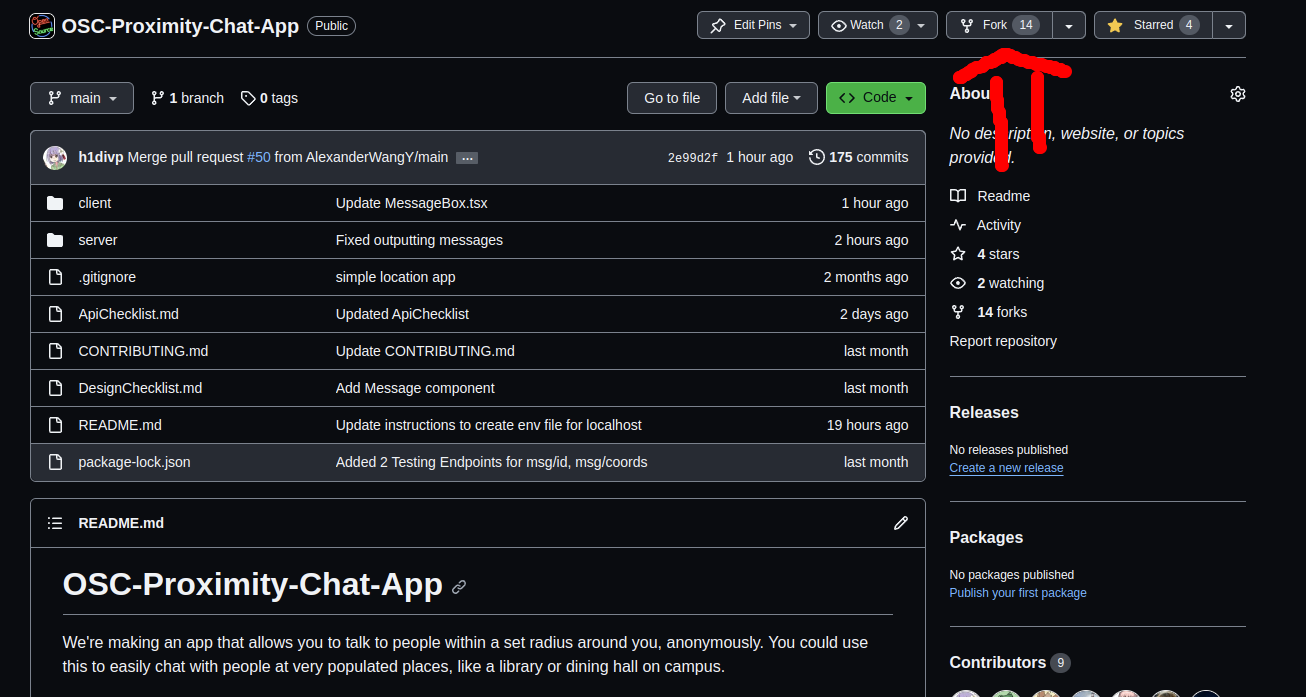
Travel to our Github repository and create a new fork into your personal repositories.
TIP
Make sure to give our repo a star too! ⭐ ⭐ ⭐
Then, copy your new forked repository's clone address and return to your terminal/bash.

In your terminal/bash, navigate to a folder/location you would like your repository to be in.
Then clone your repository and enter the directory it creates:
bash
$ git clone <paste your repository's address>
$ cd <the newly created directory>
$ git clone <paste your repository's address>
$ cd <the newly created directory>Setting up Firebase
Before we install the dependancies and run our client and server projects, we need to set up our database. For this part, we have chosen to use Google's Firebase to store our user information and messages. Our backend neatly allows us to search and send database information using a file format that is easy to read and parse called JSON.
- Log into a Google account you wish to host the Firebase on.
- Go to the Firebase website.
- Click "Add a project" on the dashboard.
- Choose whatever project name you see fit. Call it ProximityChatEchologatorEarshot if you're low on ideas (like us).
- Disable Google Analytics when asked, and then create the project
- After the project is done being created, click the settings icon and the "Project settings".
- Underneath the "Your apps" section, click the Web Development option (Looks like
</>). - Type in a name for your app (at your discretion), keep "Firebase Hosting" unchecked and click "Register App".
Setting up Firebase Database
Make sure you have already completed the previous steps in setting up firebase.
In order to allow our backend to access firebase's database and set everything up, we need to activate Firebase's Firestore Database.
- Navigate to the Firestore Database tab on the left hand side of the Firebase console.
- Click get started and select
nam5as the server. Then continue. - Select start in
test mode. - Now, navigate back to the console screen. Select the cog wheel at the top left side. Next to
Project Overview. ClickProject Settings. - Navigate to the
Service Accountstab. - Click
Generate a new private key. And thenGenerate key - It should start a download for a
jsonfile. Rename itfirebase-secrets.jsonand save into the/serverfolder in the project directory.
IMPORTANT
Make sure to also copy the contents of /server/config_example.md into a file called .env inside /server/ that you make yourself! DON'T DELETE config_example.md
After you complete these steps, your backend should now be able to access your database and also authorize JWT tokens from the client.
Setting up Firebase Authentication
We also need to use Firebase's web modular API to handle authentication on the client side (the mobile app).
- In your
./clientfolder you should see a file calledconfig_example.md. Copy the contents of that file into a file you make called.envinside the./clientdirectory. - From your firebase project's main console, navigate to the cog on the top left next to
Project Overview. SelectProject Settings. - Navigate to the
Generaltab (should be the default tab) and scroll down until you see app keys. Should look something like this:
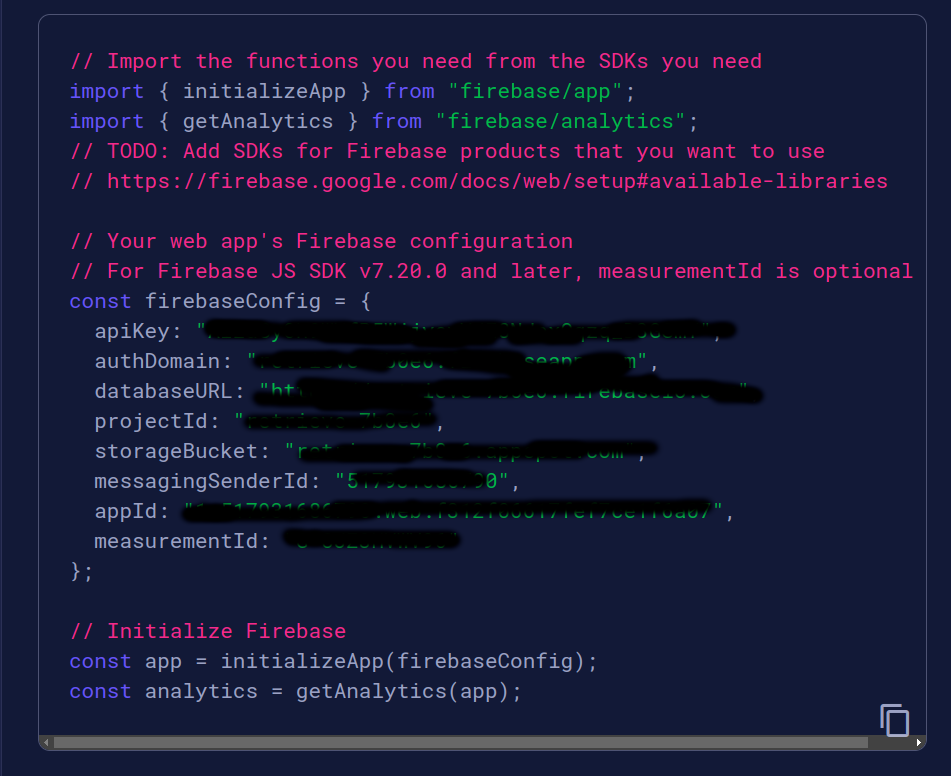
- Copy those keys (without the quotation marks) into their respective variables in the
.envfile you just created. After you are done it should look something like this:

WARNING
Do not delete config_example.md.
- Navigate to the Firebase console and click on the Authentication tab on the left sidebar. Then, click on the "Set up sign-in method" button.
- Click on the "Email/Password" option and enable it.
Now we are all done setting up our database!!
Installing Dependencies
Frontend
Navigate into the client folder and install the required dependencies using Node.js:
bash
$ cd client
$ npm install
$ cd client
$ npm installINFO
After running npm install you will likely get a warning that vulnerabilities were found. This warning can be safely ignored and auditing vulnerable packages is not necessary.
Perfect 👍!
Now, run:
bash
$ npm start$ npm startIt should bundle the app and show you a QR code. Above the QR code there should be an ip that looks like http://xx.xx.xxx.xx:8080 or something similar. Copy the IP (not the :8000 or the http://) and paste the into EXPO_IP in your .env file. You will have to do this step everytime you launch between coding sessions (think 3-4 hours without coding).
Download the Expo Go app to your phone and scan the QR code. Then it should run in your testing environment (your phone).
INFO
If you scan the QR code and it says "no usable data found" you probably don't have the app installed yet.
You are now done setting up the front end for development! 🎉 🎉 🎉 🎉
Backend
From the project root directory, navigate to the server folder and install the dependencies.
bash
$ cd server
$ npm install
$ cd server
$ npm installWARNING
Running npm install to set up frontend does not mean that the dependencies are also installed for the backend!
Navigate into the src directory. This is your working directory.
bash
$ cd src$ cd srcRunning the backend server
Since we are writing in TypeScript that will need to be compiled into JavaScript, periodically run npx tsc in a second terminal during development. Additionally, npx tsc -w will do this much more quickly and recompile on file changes.
To start the server, run npm start.
For example:
bash
$ npx tsc && npm start$ npx tsc && npm startINFO
The package Nodemon is very useful for restarting the server on file changes. If you would like to use it, install it with npm i -g nodemon. Then you can run it in a separate terminal using the nodemon command.
Now you are ready to start developing!🎉 🎉 🎉 🎉
Next, feel free to read through other parts of the documentation and codebase that interest you, and assign yourself to an issue that you want to work on!